Everything’s plugged in, it matches the diagram you were following, and it still does nothing — or something subtly wrong. Before you start pulling components back out one at a time, work through this checklist. Most breadboard failures come down to a handful of repeat offenders, and it’s much faster to check for those than to re-derive the whole circuit from scratch.
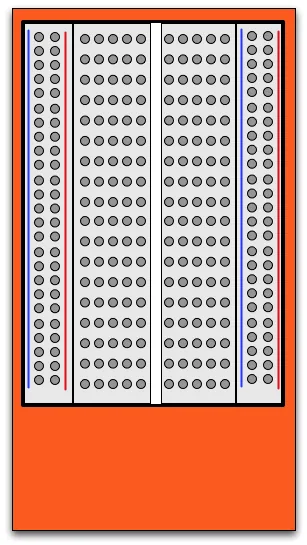
A solderless breadboard. Photo: Fmcculley, CC BY-SA 3.0 (resized)
Confirm you actually understand the board’s layout
If you’re not confident about which holes are connected to which, stop here first — how a breadboard is wired underneath covers the two mistakes that cause more “broken” circuits than anything else: assuming the centre gap is bridged (it isn’t), and assuming the power rails run the full length of the board without a break (on full-size boards, they usually don’t). If your circuit works on one half of the board and not the other, that midpoint rail break is very likely your answer.
Check each of these, in order
1. A component isn’t actually seated. A leg that’s bent, at an angle, or only halfway into the hole looks connected but isn’t making contact. This is especially common with ICs straddling the centre gap — press down evenly on both ends, not just one corner, and check nothing popped up when you pressed a jumper wire in nearby.
2. Two things are sharing a row that shouldn’t be. Every hole in a five-hole column is one electrical node. Two component legs landing in the same column — even by one hole’s worth of miscounting — shorts them together. This is easy to do by accident once a few jumpers are cluttering the board and you lose track of which row is which.
3. A stray wire strand is bridging two rows. Cheap jumper wires and stripped solid-core wire fray at the tip. A single loose strand touching the row next door causes an intermittent short that can look like anything from “nothing works” to “it works until I nudge the board.” Trim frayed ends and reseat.
4. The wrong two points are being compared for power. If you’re powering part of the circuit from a separate supply (a battery pack for motors, say, alongside an Arduino’s own 5V), and haven’t tied the grounds of both supplies together, nothing downstream of that split will behave — voltages are only meaningful relative to a shared reference. Common ground between every power source in the circuit is not optional.
5. A polarity-sensitive part is backwards. LEDs, electrolytic capacitors, and diodes only work one way round. Why an LED won’t light covers the LED case specifically, but the same logic applies to any part with a marked + side or a stripe — check it before assuming the part is faulty.
6. The hole itself has worn out. Breadboard contacts are spring metal, and pushing a thick component leg (or the same leg) in and out of the same hole repeatedly gradually loosens the grip until it stops making reliable contact — often the last thing anyone suspects, because the connection can look fine on inspection. If one specific hole never seems to work no matter what’s in it, move the circuit one row over before troubleshooting anything else.
The fastest way to actually find it
Don’t stare at the whole circuit trying to spot the fault by eye — build and test incrementally instead. Power just the first stage, confirm it with a multimeter (continuity mode for wiring, voltage mode for supply rails) before adding the next component, and add complexity one piece at a time. A fault found this way takes minutes; the same fault found by staring at a finished, non-working circuit can take an evening.

